
THE FLOATING WALL

THE REVEAL

THE BUILT-IN

THE LOW-PROFILE LOUVER

MIXED MATERIALS

THE SPACE CREATOR
All Ortal fireplaces require a heat release to be located within six inches of the top of the fireplace cavity, which is most often near the ceiling. An integral component of Cool Wall Technology, the heat release allows hot air to escape so that the wall surrounding the fireplace can stay cool to the touch. A cool wall enables creative freedom for designers to use a broader range of materials. It also allows homeowners to hang art or a TV above the fireplace without sacrificing function.
Although many designers and homeowners are fine with a visible heat release, some want to hide it so that it is not so obvious. One solution is to put the heat release in an adjacent room so it’s not visible above the fireplace. This isn’t always possible, but fortunately, there are many creative ways to hide a heat release in a home or commercial space.
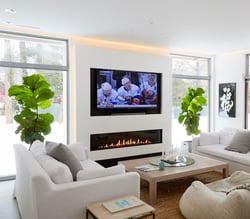 The Floating Wall
Perhaps the most popular way to hide a heat release is by using a floating wall effect. With one wall appearing to float in front of another, this is a classic architectural technique for adding depth to a space by creating an elegant shadow line at the top of the wall and on the vertical edges. Adding lighting behind the front wall enhances the effect and contributes to the luxury aesthetic. Occupants will have no idea about the practical reason for the floating wall and will naturally assume that it is an intentional architectural detail.
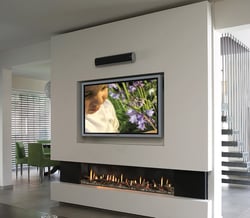 The Reveal
When a fireplace is located on a wall with openings on either side, a reveal effect can be used. Creating two walls that are flush at the edges makes them appear like a normal wall when viewed head-on. When viewed from the side, the low-profile, double-panel theme appears modern and purposeful. This look can be complemented with furnishings that maintain the contemporary, rectilinear aesthetic for continuity. A small gap at the top also creates a floating effect with an elegant shadow.
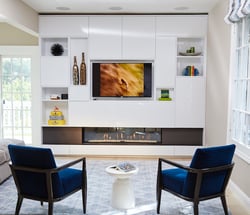 The Built-In
Built-in cabinetry is a popular design feature for both practical and stylish reasons. When integrated with a fireplace, it’s the perfect hiding spot for a heat release. A gap near the ceiling simply looks like the top of the cabinetry while it is secretly serving an important purpose. The built-in cabinets can be designed as open shelving, with cabinet doors, or as a combination of the two. Because Cool Wall Technology maintains a safe temperature for electronics, you can also install a TV and sound system to create the perfect entertaining space in the living room or den.
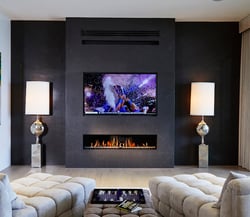 The Low-Profile Louver
For clients who don’t mind having a partially visible heat release, a low-profile louver is an effective solution. The louver can be painted to match the wall and sized to match the features below so it doesn’t draw attention. To be less noticeable, it can also be paired with speakers or placed above a retractable screen.
 Mixed Materials
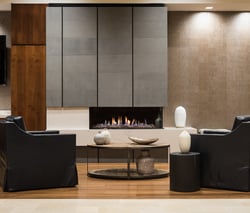
One of the many benefits of Cool Wall Technology is that it allows a level of design freedom that is not possible with traditional wood-burning fireplaces. Take advantage of this flexibility by employing mixed materials to detract attention away from an obvious louver. Whether you use slate, marble, tile, wood, or wallpaper, incorporating multiple materials draws the eye to places other than the louver at the top of the ceiling.
 The Space Creator
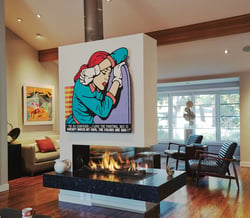
Our Space Creator models also require heat releases, but these are perhaps the easiest to hide. Because the top of the unit is kept open, the heat can be released without requiring additional design solutions. When viewing it from the floor, occupants can’t tell whether the top is sealed or not, making it the most discreet heat release of all.
The Heat Release as a Design Opportunity
The requirement for a heat release should be viewed as a design opportunity, and not a limitation. By using your creativity and design expertise, you can add features that might not otherwise be considered. Designing for a heat release is just one of the steps in adding an Ortal fireplace to your next project. To learn more about everything you must do to incorporate a luxury fireplace into your drawings, download our Project Planning Checklist.


